Laravel Dashboard - FREE download
Generate a Laravel package for your Laravel Dashboard without programming
Laravel Dashboard packages by the Dashboard Builder are created especially for use with Laravel. These packages include views and configuration designed specifically for displaying charts, graphs, and dashboards in a Laravel application.
This guide focuses on the creation of Laravel-specific packages and teaches you how to retrieve data from your database and display dynamic charts and dashboards in Laravel applications without writing a single line of code.
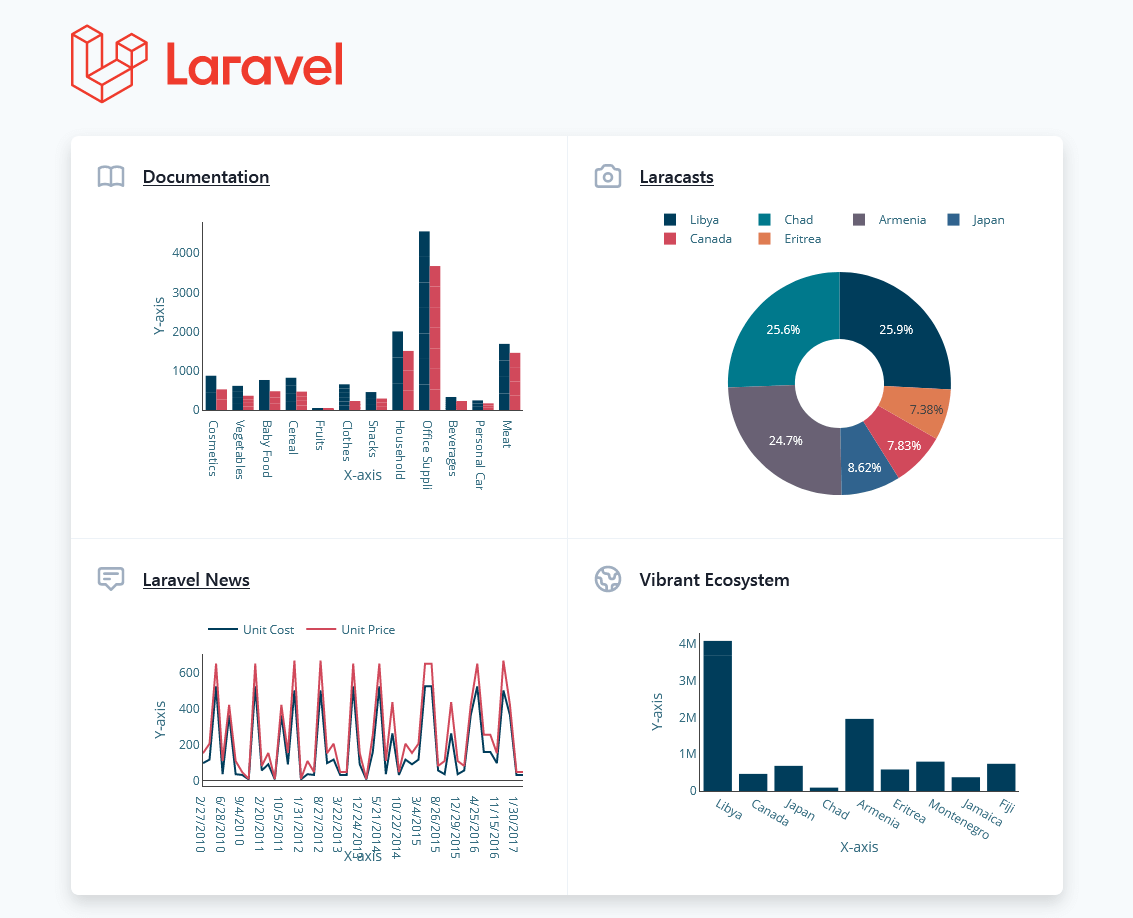
Laravel Dashboard Overview
The Dashboard Builder's Laravel Dashboard is a full-stack dashboard that includes drag-and-drop handcrafted UI elements tailored for Bootstrap 5 and an out-of-the-box Laravel front-end. The Dashboard Builder makes it easier to create dynamic interfaces without leaving the comfort of your favorite Laravel framework.
Accelerate your Laravel Dashboard with Bootstrap 5, a fresh, new design inspired for Laravel Framework 9.x and Up.
Beautiful dashboards can be created with this package. The dashboard is made up of tiles, which are, under the hood, Dashboard Builder components that can update themselves in real-time via polling.
Using the Dashboard Builder tool, you can easily create a Laravel package of stunning charts to display in Laravel.
Assumption: Laravel 9 is already installed and running on your server
Learn how to make interactive dashboards and dynamic charts in Laravel
APPLIES TO: On-premises Online Desktop
Requirements
The Dashboard Builder can be installed any platforms like Windows, Linux, Mac and Ubuntu or any other platforms support Apache.
- Laravel 9.x and up
- PHP Version 7.2 or later
- Apache 2 or later
- Windows 7 or later /Linux 3 or later
- Firefox 52, Chrome 57, IE 8
Installation
- Download from https://dashboardbuilder.net/download-free-dashboard
- Place the files in a directory on the web server. e.g. …/www/dashboar/dbuilder/
- Unzip the file using Extract Here option to the root folder of "dashboardbuilder"
STEP-1: Launch the Dashboard Builder application
- Access the web folder in your browser. e.g. http://localhost/dashboardbuilder following welcome screen will appear.
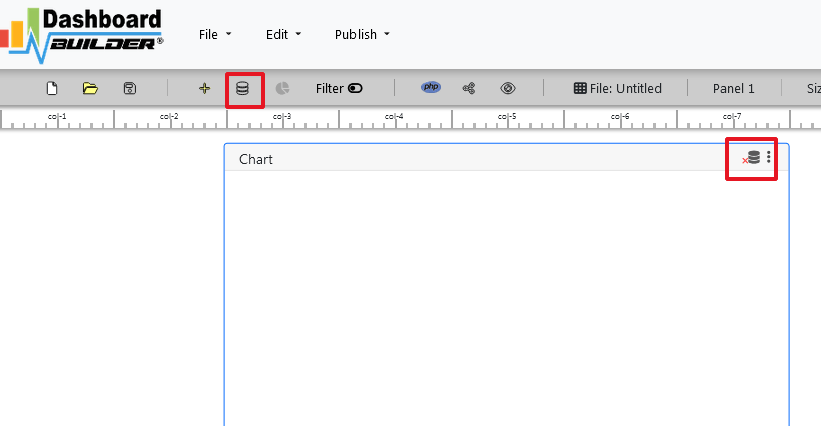
- Now Click the Database icon
- The next screen is displayed. Select a database on the Data Sources tab. Select MySQL.
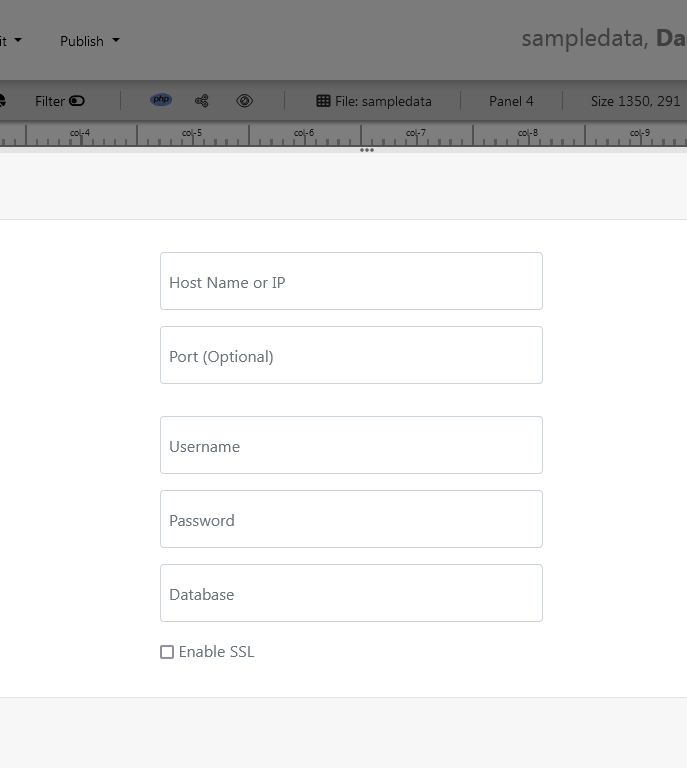
- In the next screen, Enter your database credentials. and follow the on-screen instructions to save the changes.
- When you click the Save changes , A green tick mark with a database appears, indicating that your database has been successfully connected.
STEP-2: Access the data
- In the next step we will retrieve the data from the database we just connected. Select the gear icon to the chart preferences.
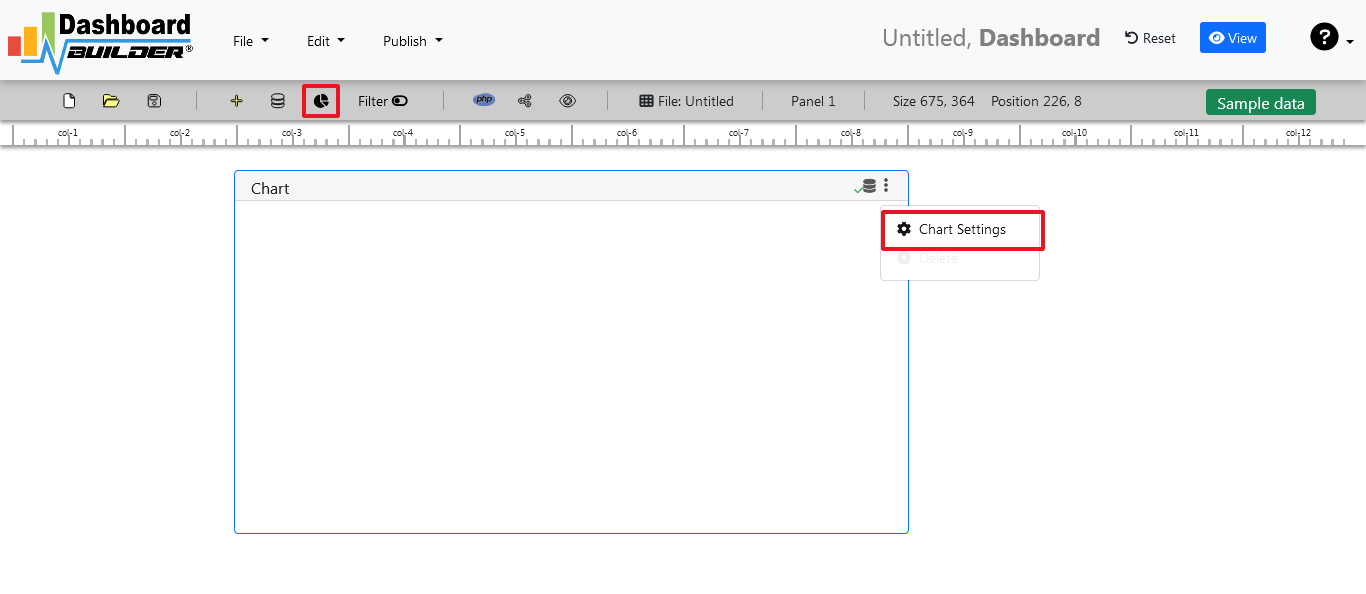
- In the next screen a list of tables is displayed.
STEP-3: Assign data
- As shown in the image below, a pop-up screen and a list of the tables will appear on the table list:

The Dashboard Builder for Laravel Dashboard includes a powerful Query Builder and a smart SQL statement builder tool for quick and easy writing of complex SQL queries without the need for manual code writing, which is intended to simplify data retrieval from the database.
- When you click on a table, a default SQL statement appears in the SQL statement box, which you can modify as needed.
- You can use up to ten SQL statements at the same time to get data from various tables.
- In this example, we'll make a simple Laravel Dashboard for our sales management.This Laravel dashboard will include a chart where customers can see sales statistics and keep product info.
- Now, type the following SQL query in the text field in the format shown below.
SELECT strftime('%Y-%m',o.shippeddate) as xaxis, sum(d.quantity) as yaxis
from `order details` d, orders o
where o.orderid = d.orderid group by strftime('%Y-%m',o.orderdate)
- Now we'll run our query and retrieve the data from the tables. Hit the Run Query button to execute the SQL query.

STEP-4: Select the X and Y axes
- The query result will be displayed. Now we must assign data from the x-axis to the x-axis column and data from the y-axis to the y-axis column. Choose your x-axis data from the X drop down list, and your y-axis data from the Y drop down list.
- Click the Save Changes button
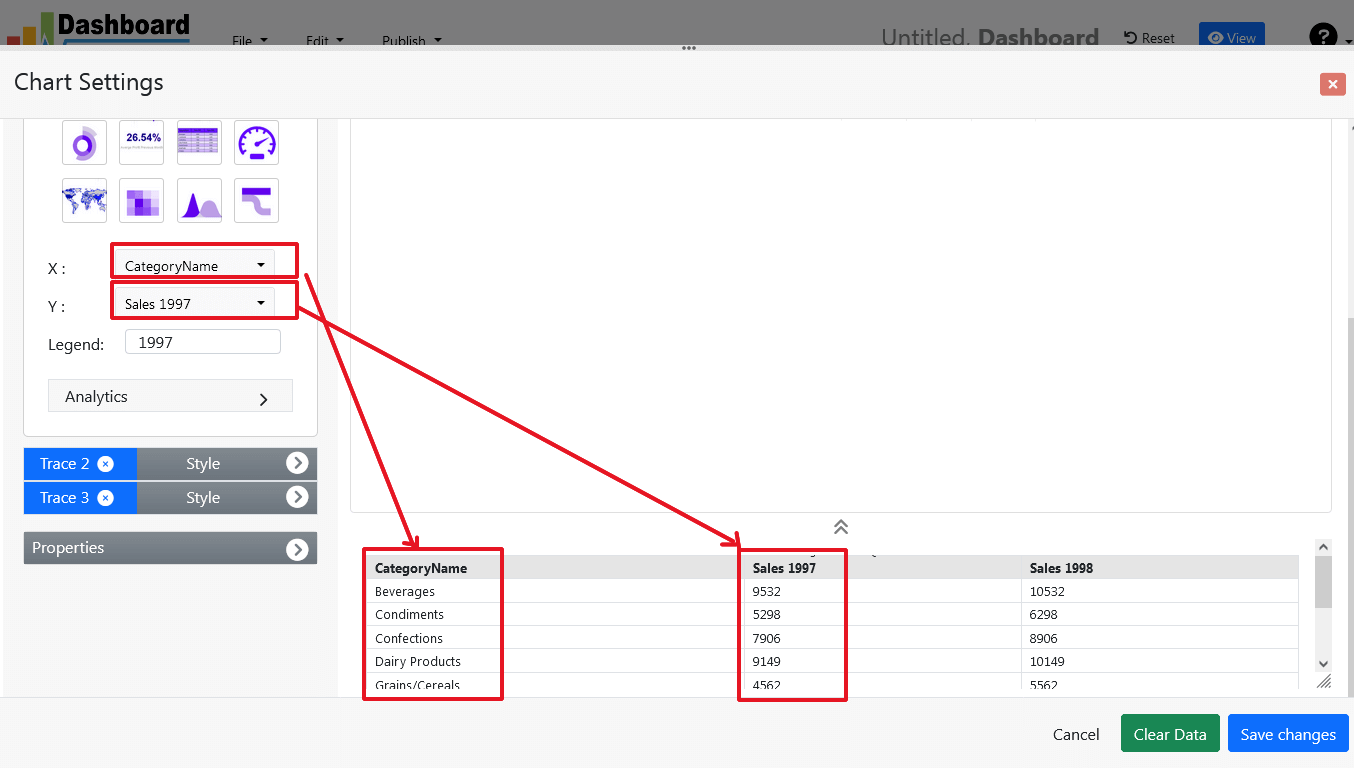
- As illustrated below, charts will appear on the screen.

STEP-5: Create Laravel package for your Dashboard
- Give your Dashboard a name and save it. The dashboard in this lesson has the name
Sales. - Navigate to Publish and then click the Laravel Code button.

- To download your Laravel package, chick the Download Laravel Code 1 button on the following screen.

- Create a
SalesDashboardfolder in the vendor of your Laravel website. - Unzip SalesDashboard.zip after copying it to the
SalesDashboardfolder. - Open the
resources/views/welcome.blade.phpfile and copy and paste the flowing line 2 before the <body> - Copy and paste the following code 3 into
resources/views/welcome.blade.phpwhere you want the chart to appear. (where 0 is your chart number) - Copy and paste the following code 4 into
resources/views/welcome.blade.phpif you want to show the complete dashboard.
<? php require_once(base_path('vendor').'/SalesDashboard/dashboard.blade.php');?>
<? php echo $result[0];?>
<? php SalesDashboard($result);?>
Laravel Dashboard Example pages:
Whether you're looking for inspiration or just want to take a quick look at your clients, a pre-made sample page can get your project started. Creating dashboards in Laravel applications has never been easier.
Conclusion
You've learned how to create dashboards in your Laravel project, create new charts and graphs, and customize the look and feel using the dashboard builder. Before we go, we'd like to introduce you to the premium version of Dashboard Builder, which has many features compared to the free version.